One of those renos was to take out a wall between the kitchen/dining/living room areas, and install an island in the kitchen. The top of that island has an extended round end, and it is built to accommodate a full size garbage can, right in the middle of his kitchen! Have I mentioned that I think his wife is a saint? We had a good laugh when I said “Of all the decorating shows I watch, I have never seen any of the designers incorporate a full size garbage can!” He assured me they would if they lived with this many people and had to take a full bag to the curb daily.
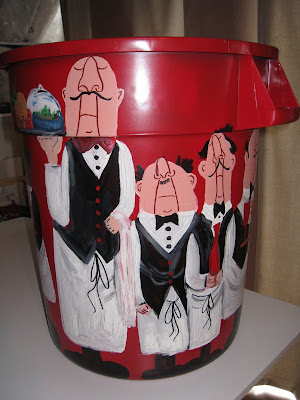
For his birthday, my friend Ang and I got together and painted a garbage can. I mean, if it’s going to be a focal point in his home, it should look good don’t you think? We had so much fun painting it. The design is copied from a pasta set I have. It’s bright and cheerful and I can’t wait to give it to him.
Ang took pictures on the day we worked on it, a delightful Saturday, and has created a little slide show of the progress. The picture below is the finished project, with faces on and details added.
To view Angela's photo album: "fat chef weekend" Copy and paste this into your address bar:
http://picasaweb.google.ca/lh/sredir?uname=NewYorkMay09&target=ALBUM&id=5384521412697192673&authkey=Gv1sRgCOy6w97kiKD9ZA&invite=CKXC3PAO&feat=email
To do this we spray painted the garbage can (a plastic one) with paint designed for plastic lawn chairs. From there we sketched the outlines with chalk, using the pasta set as a reference. (It should be pointed out somewhere here that he loves pasta). With that done we began filling in the colors and details. When it was done, we let the acrylic paints dry, and then added the faces and ties on their aprons with Sharpie markers in brown and black. With that done, the entire project was finished with two coats of spray acrylic varnish.
I am looking forward to delivering it to his home and hearing his response to our artwork!


1 comment:
This is one of the most fun projects we have ever done together (and the list is quite long) You did an amazing job of the faces!!
Thanks for such a great weekend.
Angela
Post a Comment