Saturday, May 21, 2011

Mother's Day at the Beach


I heard from all my children, still children in my mind despite their mature ages, early in the day.  I called my own mother, age 82, and she was already out with my cousin but I had a delightful conversation with my Dad!  He was home fielding all the "mother's day" calls.  I puttered around in the house and noticed the floral delivery van going up and down our road 8 times before I set out to walk the dog.


So, all that being done, and being on my own for the day, I decided to take the dog for a walk on the beach.  Such a privilege to have the beach accessible on a daily basis.  I packed a peanut butter and jelly sandwich, a thermos of tea, my sketching kit, and off I went with the dog.  We walked a good long way until I decided on the picnic table I would rest at with my sandwich and tea. 


It was a beautiful sunny day.   I passed evidence of other peoples' exuberance, in the photograph above, and was such a delight to be able to spend my time in this way.  Tuffy and I sat at a table, munched on our snacks, sipped on our tea, and sketched in my journal.  I'm not a dedicated journal keeper, but this particular day it was a pleasure.  Here's a photo of my inspiration.... not anything at the beach, but something that has struck my heart with it's simple beauty.  They are "Pink Fawn Lilies"
and there's a huge patch of them behind our fence, growing wild, as well as a bunch of them scattered along the trail I walk with the dog in the morning.  Here's more information on them:  http://www.sierraclub.bc.ca/education/ecomap/georgia_depression/2pflilly.html


When I got home I sent an email to my three sons telling them how lucky they were.  I had seen the floral delivery van going up and down our road about 8 times before I went out with the dog.  My youngest son replied that he couldn't afford it this year, but that he would like to take me on a vacation for Mother's Day some time soon.  Nice.....let's make it tropical with a swim-up bar!  Number Two son said he had weeded the flower bed in his front yard and thanked me for the incentive to get that done!  Number One son cracked me up.  His response was "Are you guys under surveillance?  If I saw a floral delivery van going up and down my road 8 times, the last thing I would be thinking of would be mothers!"  Now that made me laugh!

Monday, May 16, 2011

Art of a Different Sort....with Rocks!

We have finally been blessed with some decent weather, which instantly takes me outside into the yard.  Being a yard we've only lived in for one year, there is lots to do!  The house was neglected and deserted for about five years before we bought it at a bargain price.  The yard was a disaster.  It is a conglomeration of buttercups, dandelions, moss, fuzzy fernlike ground cover and one really obnoxious weed I can't identify but let me tell you it STINKS when I pull it out!  But this is a picture of our "Pink Champagne" clematis in bloom already!


I've been mowing, weeding, shaping beds, planting, moving dirt to fill low spots and pruning.  But there came a point where one bed is almost complete, which brings me to the point where I absolutely HAVE to embellish it with some of my rock and pebble collection.  So.....having reached this point, I had to get the buckets and bags of rocks that I moved with us (yes, I move my favorite rocks from house to house, and I know where I got them all!....call it an obsession!).  I think it interesting that this one looks like a paw print, but I didn't realize it until I photographed it!  Remembering my special dog, Buddy, subconsciounsly. 


But my collection was in a state of disarray having been left in storage over the winter in their various containers.  There was nothing to do but pour a glass of wine, sit down in the sun, and sort my collection.  My husband thought I was nuts.  Of course I had to have some water to wash them off and new containers to sort them according to my plan....the really black ones will go in the bird bath, the olive green ones (quite rare) will be in a bowl that is featured in the garden, the red ones we got in Montana , on a very special vacation, will be kept separate, the weird shaped ones will be used as features, also in the garden, and the flat ones I can't resist picking up will be little "cairns" dotting the landscaping!  I've sprinkled this post with photos of my afternoon of sorting and organizing.....if there's a rock lover out there that sees this post, I know they'll understand!  And here's a photo of my collection of heart shaped rocks, begun when I lost my dear friend "Buddy".  A Rottweiller who wanted to be a lap dog! 


Friday, May 06, 2011

A lesson in contrast well learned! Liquitex Inks!

I was working on a project using Liquitex Inks.  I've had it in previous posts.  I finished it!!!  Did you read that correctly????  I FINISHED IT!!!  Here's a close up photo: 


And then there's "Show & Tell" at our groups recent retreat.  It was set out on display with several other 12 x 12 "tree challenges".  I was HORRIFIED !!!!  There is my beautiful and well loved project looking bland with no focus.  The color of the tree I chose to put on the inked silk background doesn't show from 10 feet away.  Talk about a lesson in looking at things from a distance as well as right at arms length.  The little tree I chose to put in there fades into the background and is lost! Here's a picture from a distance.  See how the tree is lost on the horizon? 


So my only recourse is to replace the tree with something that offers more contrast.  Oddly enough, when I was working on it I made two little thread trees.  The one in these photos, and a blue one.  As soon as I saw the tree was not enough contrast I decided I needed to replace it with the darker one I stitched at the same sitting.  But.......I can't find it!!!  I've cleaned my entire studio and organized all my supplies, UFO's and threads.  That darker trees is not to be found.  So, now that I've wasted more time than it would take to stitch a new one looking for the one I have already done but can't find.....I'm stitching away making new one with more contrast.  And here I thought I'd tidied my studio rather well!


A good lesson learned about stepping back and looking at your work from a distance.  Or perhaps it's a lesson in needing a bigger studio so that I CAN step back to look at it.....either way, next post should be the finished project with a tree that shows from any viewpoint! *sigh* :(

Tuesday, March 15, 2011

Liquitex Silkscreen Medium, Results & Game On Diet!

I'm back at it!  Feels good.  All the travelling/nursing/babysitting grandkids has passed for a while and I've managed to get moving again. 


Part of this happy development is that my niece talked me into joining a group called the "Game On Diet".  Go here to check it out.  http://www.thegameondiet.com/  In short, it's a healthy living plan that not only helps you lose weight, but also encourages exercise, sleeping the correct amount of hours, drinking water, and best of all, changing bad habits and trying new good habits.  And that part has resulted in this FINISHED project!


This is the result of using Liquitex Inks, provided to me by C&T Publishing as one of their author ambassadors (means I get to play with new products!)  I'm loving it. 

These inks are wonderful.  Lots of pigment and easy easy easy to use.  I've tried stamping with them, painting fabric with them, monoprinting, and silk screening on both paper and fabric.


One comment on an earlier post of mine regarding silkscreening asked what I was using for medium to allow use of the inks on a silk screen, and to answer that.....


I laid out as much Liquitex Iridescent Fluid Medium as I thought it would take to scrape across the silk screen itself.  To that I stirred in drops of the Liquitex Inks until the color was intense enough for my liking.  I stirred it really well so that it was completely mixed.  And that's it!  The only thing of note here is that the iridescent medium takes more attention to wash out of the silkscreen than regular medium.  If not cleaned well, your silkscreen would not last the predicted 100+ prints! So as always, the price to pay amidst all this exciting play is careful clean up!


With a spoon I laid out the inked medium at the top of the silkscreen and pulled it with the soft edged scraper to the bottom.  This was the result.


This is a piece of commercial fabric, with the silk screen placed on the print where I thought it would work well.


I pressed it when it was dry, to set the colors altho the inks supposedly don't need that, but having added the medium I thought I'd ensure permanence. 


Then I decided to cut the tree up and displace it in a wall hanging in the required 12 x 12 size.  The results above are what happened.  The blue fabrics are the ones used in an indigo dye workshop I took with my girlfriend (where I managed to stab her in the elbow with my scissors but that's another story)!  The reason you see my last name on one strip is that I couldn't use it if I cut off the name.  I love how some of the shading in the dye process fell into the design. 


The orange piece on the right side is a piece of hand painted and sponged fabric that I did when playing around, and the border is a piece of hand painted fabric that was cotton, but had a textured weave and I've used the bumpy strips in it, which collected the paint in a different way, to represent bark around the hanging. 


The quilting of the Garry Oak leaves is done with King Tut Thread from Superior Threads http://www..com/shop/category/king-tut/description/  The quilting of the tree is done with blue Sulky Sliver metallic. 


Here are some close ups: 


Wednesday, March 02, 2011

A New Chapter in my Life!

It's not a book yet, but it could be!  I'm setting out on a new chapter in my life.....the one that begins when you retire from your full time office job and start another life style.  I've looked forward to this for some time now, as do many of us.  But it was expedited by the twists and turns that life throws at us. 

First of all, my retirement date was planned for the end of March.....making April 1st or April Fools Day the first day of my retired life.  An auspicious date for such a monumental change don't you think?  So, as always, with "the best laid plans of mice and men" .....things didn't work out that way.  During my Christmas vacation, I fell and broke my foot.  That put me in an air cast, with instructions to keep my foot elevated for a period of time.  But, beyond that, I was unable to drive our standard vehicle, so had to take extra time off work.  Rather than have the office go through training someone for my absence with the broken foot, and then again six weeks later for my permanent replacement, I decided to expedite my retirement date. 

So, I guess if you want to get technical, I retired at Christmas break because I've been away from work since that time!  My last official day on payroll was January 28th, and my first official day of retirement turned out to be February 1st. 

But nothing is ever that clear and concise.  I was sitting here in my chair on the morning of January 30th when the phone rang.  It was my Mum, and she was upset.  My Dad had fallen, broken his hip and was in the hospital.  She asked "Can you come?  I can't handle this alone."  I said I would be there as soon as I could.  I was on a plane within two and a half hours, with the help of my friend who drove me there.  She was great as we put things into her vehicle.  She asked "Do you have your other shoe?  If you're there long you may want it."  So I dashed back inside to get the other shoe that matched the one I had on my "good foot".  Turned out to be a good thing because not only did my stay stretch to three weeks, but the ice and snow was treacherous with an air cast, so as soon as I thought it feasible, I took the boot off and wore my runners, with my Mum's "cleats" attached.  Great invention that one! 

So, my Dad waited 2 1/2 days for surgery, but has pulled through miraculously considering he is 96.  There were some long worrisome days, but Mum and Dad have yet again surmounted the obstacles thrown in their path and Dad is gaining strength and Mum is able to help him. there was a week in the hospital, a week in the rehabilitation center, and then a week at home.  I stayed until I was sure they could handle the shower, cooking, the trips to the lab for blood tests etc.  I didn't really want to leave when I did, but I had things at home that needed to be attended to as well!  One being the pets I had deserted in my rush to get there.  People were looking after them and I totally appreciated that, but you can only let people help you for so long! 

One of the things I did to help out was to walk their adorable and extremely well trained little dog three times a day.  I couldn't help but notice the houses in the neighborhood.  I like unusual buildings and this district was amazing....everything from the heritage home to the ultra-modern....side-by-side making a very eclectic neighborhood.  It was a pleasure to walk around and see these places. 

So now I'm home, adjusting to retired life, checking on my parents every second day by telephone, and planning to go back for a short check-in on spring break.  I'll be taking two granddaughters to see their Dad at that time and will tie in a visit with Mum and Dad.  In walking around in my back yard yesterday, I discovered a surprise....crocuses blooming all over the lawn in our back yard.  A harbinger of spring that was very welcome after walking a little dog dressed in boots and sweater in -37 degree windchills! 

Saturday, February 05, 2011

Liquitex Inks, Silk Rods, Tutorial continued.....

This is a photo of my silk rod project. I posted the first steps earlier on this blog.   Today I worked on the little project created by the silk rods colored with Liquitex Inks.  Those inks were provided to me as an Author Ambassador for C & T Publishing.  As shown in my previous post, they were soaked and laid out to re-glue themselves to each other as they dried.  It worked but only partially.  There were some gaps that separated. 

Now I've taken embroidery floss and done some big hand stitches on the seams and above the seams, to create some texture, some embellishment, and the hidden bonus was sticking the bits together.  Can you guess what's next?  I'll make one of the thread trees featured on the cover of my book to add to it.  I never know when it's enough.....could keep going and going.  I feel I need to add some beads as well!  I like to embellish....what can I say? 

I especially like the shape this project has taken on.  I plan to mount it inside an artists canvas, with the backing wrapped around the frame.  That way the "bubble" developed in the silk rods would be protected from being crushed.  We'll see.  For now, the tree and some beads. 

Tuesday, February 01, 2011

Teaching Trees at the Schoolhouse Guild


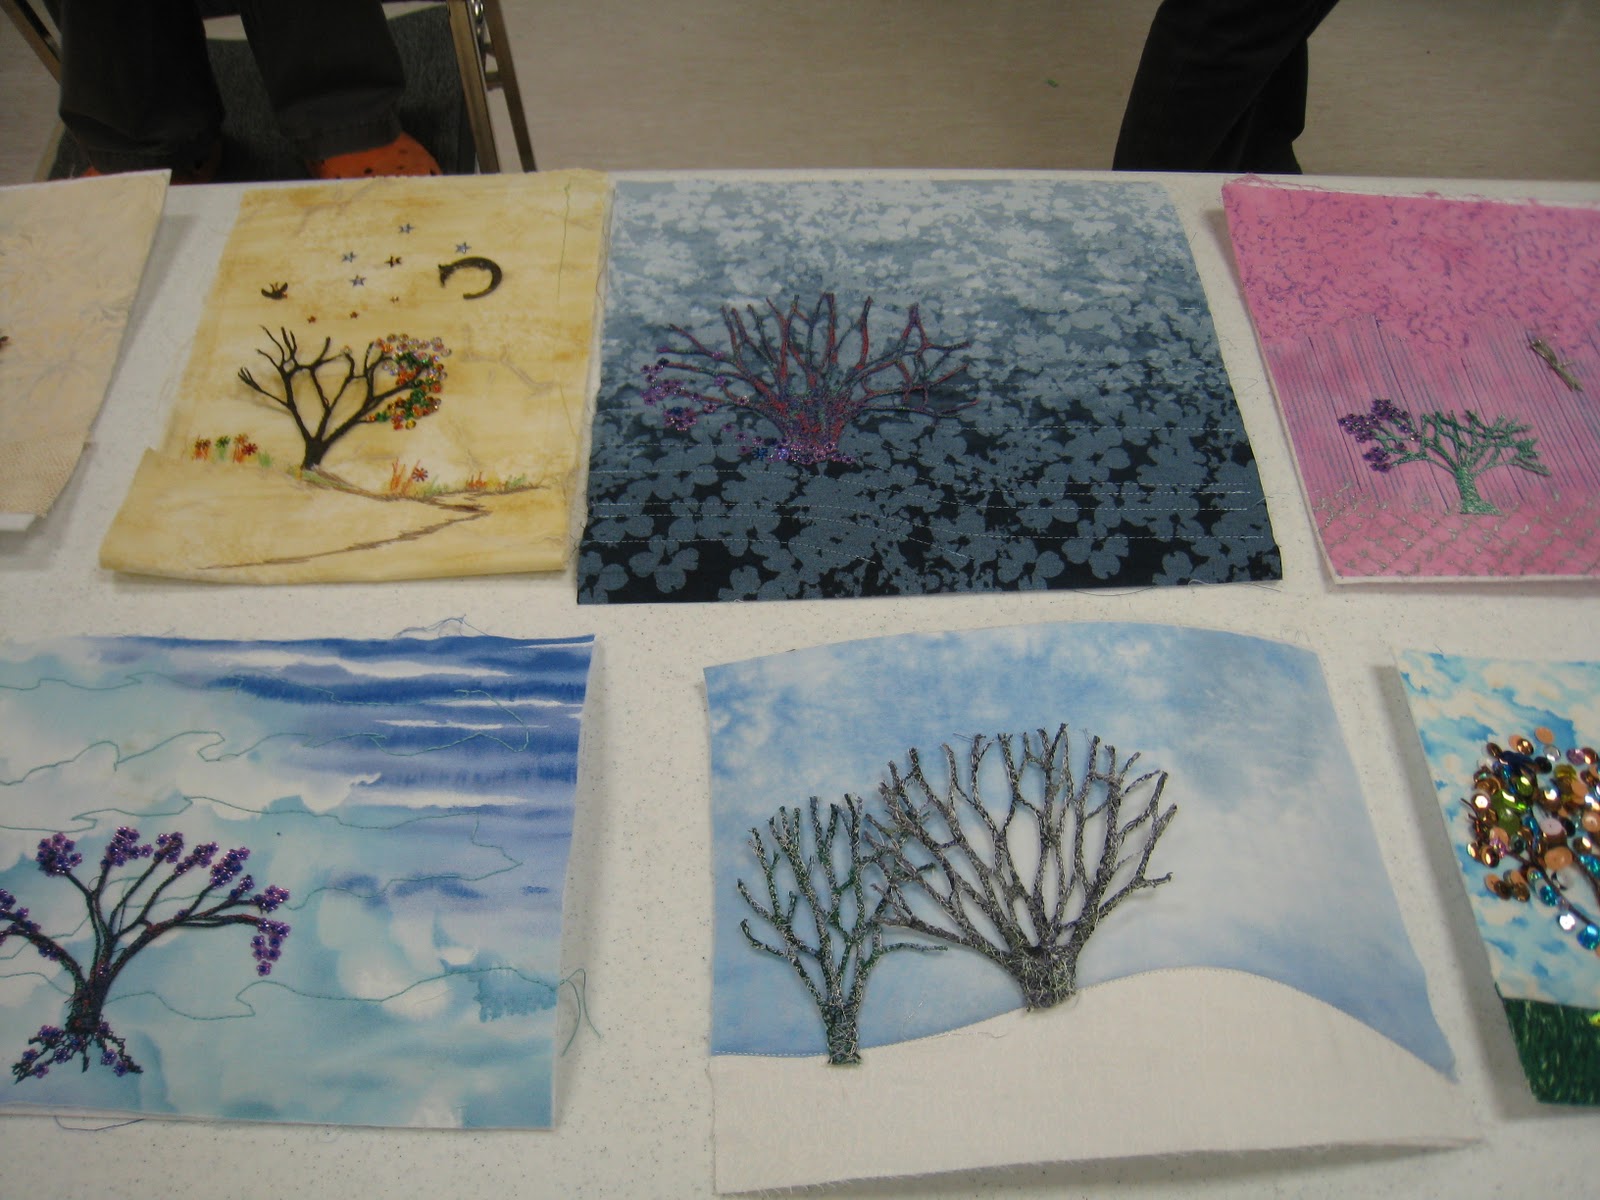
On Saturday I had the privilege of teaching the tree technique (used in the project on the cover of my book) to the Schoolhouse Quilter's Guild of the Comox Valley.  http://www.schoolhousequilters.com/  What a delightful group of students I had.  Humour reigned supreme in this class, as did self confidence and creativity.  These ladies were enthusiastic, dedicated and outstanding students. 


I only have some quick pictures of their work, they've promised to send me individual photos as they finish them up.  It's such fun to teach that class because people are always amazed at how it works and that they can do it. 

And in the midst of the class, one of the students looked out the window and noticed this tree.  We all found it fascinating how it had hung onto it's seed pods all through the winter winds, rains and snow!  It's a Chestnut tree, but also inspiration for another project!  Zoom in on this one if you can to see nature's decorations hanging in the branches (I couldn't leave the classroom to go out and get a better picture!)